

If you color your hair regularly, you probably know the moment when your fresh color suddenly flips into “pudding head” mode—obvious root regrowth, uneven shades, and that sharp line between old color and new growth. It’s one of the most common frustrations for anyone who dyes their hair. The good news? You don’t need a salon appointment every four weeks. With the right technique and tools, you can achieve a seamless, salon-worthy root touch-up at home.
This guide breaks down everything you need to know: causes of regrowth lines, timing, step-by-step methods, and a complete tools checklist to make your DIY root touch-up smooth, easy, and stress-free.
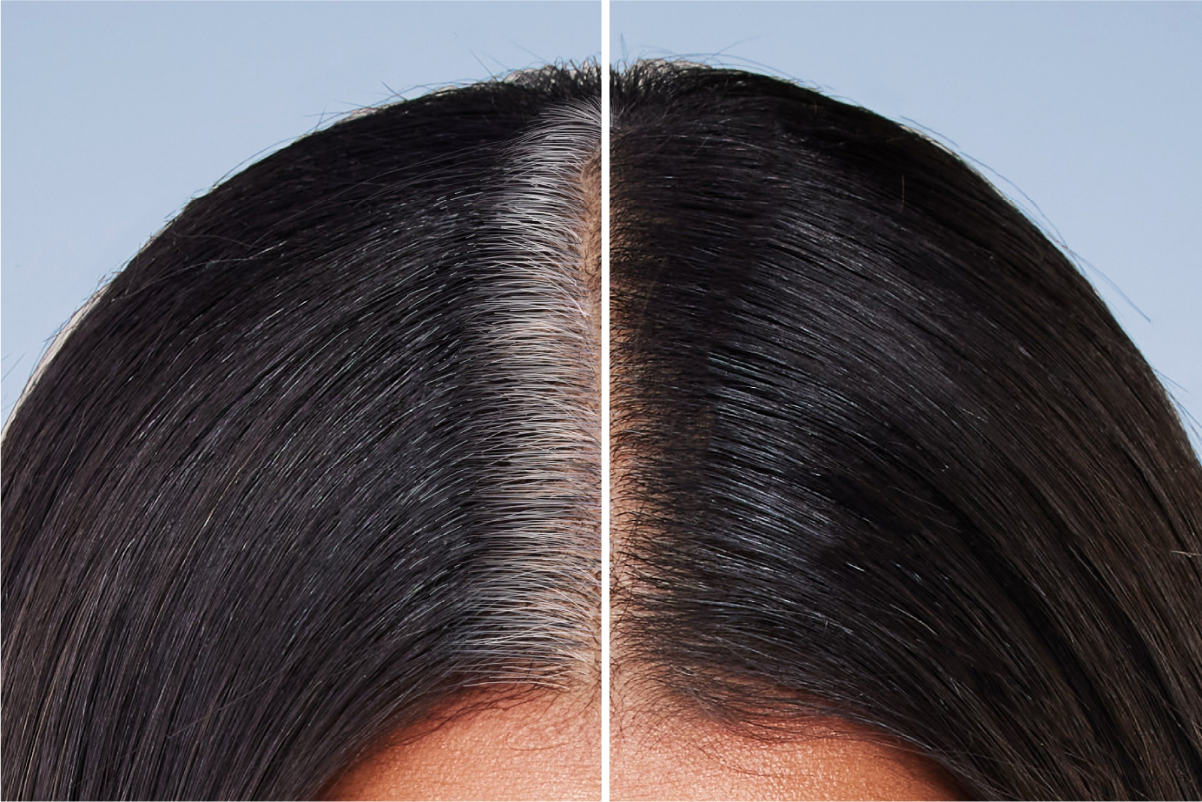
Why Does “Pudding Head” Happen?
Root regrowth happens when your natural hair color grows out and creates a visible contrast against your previously dyed hair. This demarcation line becomes even more noticeable if:
● Your natural color is darker or lighter than your dyed color
● You dye your hair frequently
● You use permanent dyes
● You don’t blend or feather the color during touch-ups
Once the line becomes too wide, it’s much harder to blend. That’s why touching up roots early and correctly is essential.
When Should You Touch Up Your Roots?
For most people, the ideal root-touch-up window is every 4–6 weeks.
Here’s how to judge:
● 1 cm regrowth → easiest to cover, very seamless
● 2–3 cm regrowth → still manageable with proper feathering
● Over 3 cm → requires root-smudging techniques to avoid banding
The earlier you refresh, the more natural and blended the final result will be.
How to Touch Up Your Roots Seamlessly (Step-by-Step)
Step 1: Choose the Right Formula
For DIY root touch-ups, choose these:
1. Permanent hair color
● Best for covering greys and maintaining long-term shade consistency
2. Cream or gel formulas
● Less dripping, easier for precision
3. Cool-toned or neutral shades if unsure
● Limits brassiness at the root area
Make sure the color you choose matches your previous hair dye. If you’re between two shades, choose the slightly lighter one—dark roots catch pigment faster.
Step 2: Section Your Hair Like a Pro
Proper sectioning is what separates salon-level touch-ups from DIY disasters.
1. Create four sections:
● Center part (front to back)
● Divide ear-to-ear
2. Clip each section
3. Work from the highest visibility areas first:
● Hairline
● Part line
This ensures even processing.
Step 3: Apply Dye Only to the Roots
Avoid overlapping onto previously colored areas. Overlap leads to:
● Dark bands
● Patchiness
● Dull ends
Use a brush to apply dye ¼ inch (0.6 cm) from the scalp outward. The scalp emits heat, so the color will process slightly faster inside the root area.
Step 4: Feather the Edge for a Natural Blend
This is the trick that prevents harsh lines.
● Use a clean, dry brush or gloved fingers
● Lightly swipe downward where the new dye meets the old color
● Aim for soft diffusion, not full saturation
This creates the seamless transition you see in salons.
Step 5: Follow Accurate Processing Time
Most root touch-ups need 30–40 minutes, but always follow your dye’s instructions.
● Do not rinse early → roots will look lighter or orangey
● Do not over-process → roots may turn too dark
If you’re refreshing ends, apply color to the mids/ends only in the last 5–10 minutes.
Step 6: Rinse Thoroughly + Use Color-Safe Products
After rinsing, always follow with:
● Color-safe shampoo
● Nourishing conditioner
● Cold water for extra shine
This seals the cuticle and locks in pigment longer.
Expert Methods for Extra Seamlessness
1. Root Smudging (for major regrowth)
If your roots have grown out more than 3 cm:
● Use a slightly lighter or more neutral shade near the demarcation line
● Blend using finger smudging
● The result is a soft, gradient root effect
This avoids banding and gives a dimensional, salon-styled look.
2. Covering Grey Roots
Grey hair is often more resistant.
Tips:
● Choose one level darker or neutral
● Let the formula sit on greys slightly longer
● Apply to the most stubborn areas first (temples, hairline)
3. Bright Colors / Fashion Shades
If your hair is pastel, red, copper, pink, etc.:
● Pre-lightening may be needed for true color payoff
● Use semi-permanent dyes for vibrancy without damage
● Always patch-test, as fashion shades stain quickly
Tools Checklist: Everything You Need for a Perfect At-Home Root Touch-Up
Essential Tools
● Hair Dye or Root Touch-Up Kit (permanent or semi-permanent)
● Developer (if not included)
● Dye Mixing Bowl
● Application Brush
● Gloves
● Clips for Sectioning
● Old Towel or Cape
● Color-safe Shampoo & Conditioner
Nice-to-Have Tools
● Precision root applicator bottle
● Rat-tail comb for clean parting
● Vaseline or barrier cream (protects skin)
● Timer
● Disposable ear covers
● Microfiber towel for gentle drying
For Extra Blending
● Dry blending brush
● Wide-tooth comb
● Root-smudging brush
Having a complete toolkit minimizes mistakes and makes the DIY process smoother and faster—especially for beginners.
How to Maintain Longer-Lasting, Touch-Up-Free Roots
● Wash with cool water
● Avoid sulfate shampoos
● Use UV protection sprays
● Deep condition weekly
● Avoid overwashing (2–3 times a week is ideal)
These habits dramatically extend the life of your color and delay your next root touch-up.
Conclusion:
Root regrowth—aka the dreaded “pudding head”—doesn’t have to be a monthly crisis. With the right preparation, formulas, and tools, DIY root touch-up is simple, clean, and highly effective. Whether you’re maintaining dark shades, covering greys, or refreshing bold fashion colors, a seamless blend is absolutely achievable at home.
If you're ready to say goodbye to harsh lines and hello to salon-smooth color, follow this guide and bookmark the tools checklist for your next touch-up session. Your hair—and your wallet—will thank you.


